Užitečné tipy – Korekce expozice

Při fotografování v interiéru nebo na slabě osvětlených místech je nutné změnit nastavení fotoaparátu tak, aby byl předmět na snímku dostatečně světlý. Můžete použít buď korekci expozice nebo blesk.

Výběr konkrétní metody závisí na fotografovaném předmětu a podmínkách při pořizování snímku. Použití blesku k osvětlení předmětu je velice snadné. Pokud jej ovšem použijete, mohou výsledné fotografie působit nepřirozeně, neboť blesk zcela potlačí přirozené okolní osvětlení předmětu. Naopak pokud využijete korekci expozice, okolní světlo na snímku zůstane, takže fotografie bude působit mnohem přirozeněji. Korekce expozice ovšem může vést k prodloužení expozičního času a zvyšuje se pravděpodobnost rozmazání snímku pohybem předmětu nebo chvěním fotoaparátu. Jste-li v situaci, v níž hrozí rozmazání snímku, můžete zvýšit hodnotu citlivosti ISO. To ovšem současně povede i ke zvýšení úrovně obrazového šumu na snímku. Na otázku, která z těchto metod je lepší, neexistuje jednoznačná odpověď, proto je asi nejlepší zkusit snímek pořídit jak s bleskem, tak i bez blesku, s korigovanou expozicí.

Porovnejte tyto snímky pořízené s korekcí expozice a s bleskem

Snímek pořízený s korekcí expozice: Velmi dobře je vidět výraz tváře fotografované osoby i okolní světlo, ovšem světlé oblasti v pozadí jsou přeexponované. Snímek pořízený s bleskem: Celý snímek je dobře osvětlený, ale jas interiéru/exteriéru a atmosféra vnitřního osvětlení nejsou reprodukovány správně.

Užitečné tipy – Auto Bracket

Při fotografování je často velmi obtížné se rozhodnout, jaké nastavení expozice byste měli použít. Jednou z velkých výhod digitálních fotoaparátů je, že po fotografování můžete nechtěné snímky jednoduše smazat. Proto vám doporučujeme pořídit více snímků s různými nastaveními expozice. K tomu můžete s výhodou použít funkci BKT (Auto Bracket) – pokud jí je váš fotoaparát vybaven. BKT je funkce umožňující pořízení série těsně po sobě jdoucích snímků s postupně se měnící hodnotou korekce expozice. Jednoduchým stiskem a podržením tlačítka spouště můžete pořídit libovolný požadovaný počet snímků.

U většiny typů fotoaparátů se funkce BKT nachází v menu režimu fotografování [DRIVE]. Nastavit můžete velikost změny korekce expozice (krok v EV mezi jednotlivými pořízenými snímky) a počet snímků, které se mají pořídit.

* Toto je obrazovka menu fotoaparátu SP-500UZ

Pro pořízení snímků jednoduše stiskněte tlačítko spouště a podržte jej stisknuté. Snímky se pořídí v následujícím pořadí: Pokud uprostřed auto bracketing sekvence tlačítko spouště uvolníte, budou se snímky ukládat až do okamžiku jeho uvolnění.

Snímky se ukládají zleva doprava, v následujícím pořadí: [BKT] Hodnota korekce: 1.0 / Počet snímků: 5

±0 +2.0 +1.0
-1.0  -2.0

Snímky se ukládají zleva doprava, v následujícím pořadí: [BKT] Hodnota korekce: 1.0 / Počet snímků: 5

+2.0 +1.0 ±0
-1.0  -2.0

Lekce 1: Krajina


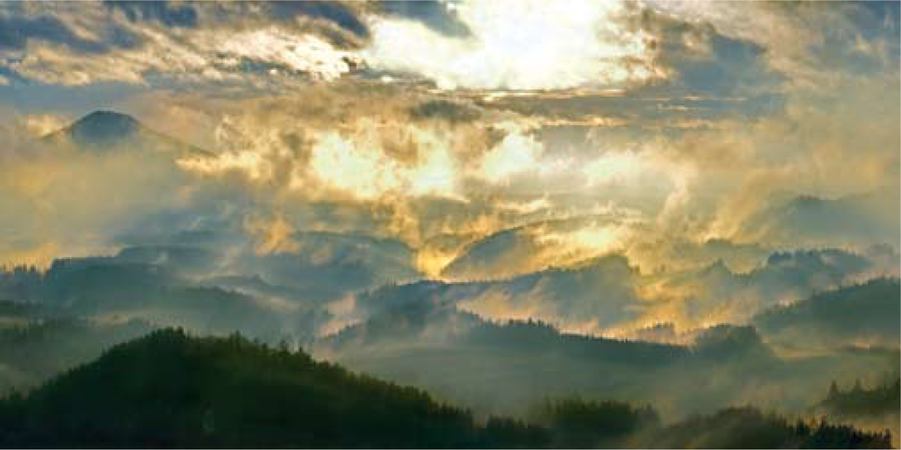
Podvečerní atmosféra Olympus E-330, objektiv 14-54 mm/2,8-3,5, Foto Bohumil Eichler

Kdy fotografovat krajinu

Za každého počasí, v každé roční době a skoro v každé denní hodině. Ale musí se v ní něco dít. Vděčné jsou ranní a podvečerní nálady (opary, dlouhé stíny) nebo dramatická obloha. Nudné bývají záběry za poledního slunce s blankytnou oblohou.

Profeisonální finta

Krajinu zásadně fotografovat do formátu RAW, ale současně na malý JPG, který se rychleji otevírá a snadno prohlíží. Jednoznačně špatné záběry smazat hned, ty sporné až doma v počítači.

Kde fotografovat krajinu

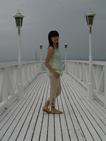
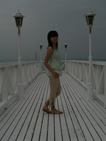
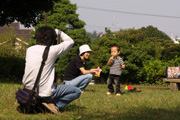
Mnozí preferují krajinu bez civilizačních prvků a lidí. Ale zajímavá může být i cesta, hrad na horizontu nebo moře s rybářským přístavem. I vhodně zakomponované postavy snímek oživí.

Čím fotografovat krajinu

Kompaktem, nebo zrcadlovkou? Čím dokonalejší technika, tím je snímek prokreslenější a výraznější. Podstatná je kvalitní optika objektivu. Používejte sluneční clonu nebo zastínění objektivu rukou.

Jak fotografovat krajinu

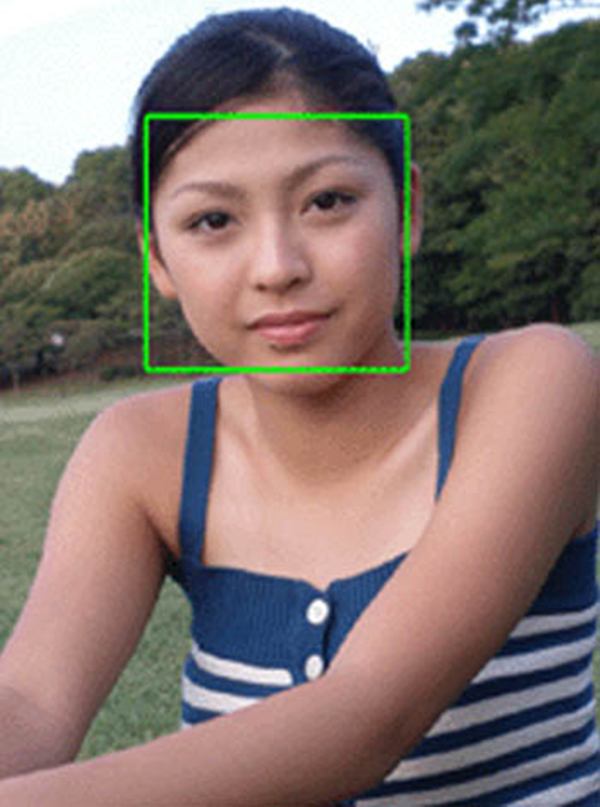
Uvidíte-li poutavý námět, vyhlédněte si místo a záběr pečlivě nakomponujte. Udělejte snímky s různou expozicí, různým ohniskem, z různých pozic. Zkušenější fotograf pozná, kdy slunce svítí ze špatné strany (v popředí je neprokreslený stín) nebo kdy by scenerii prospělo rozptýlené světlo (fotografování potoků a vodopádů ve stržích), a vrátí se ve vhodnější dobu.
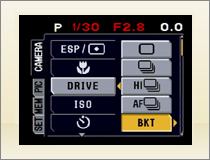
Nastavení aparátu

Fotografujte v nejméně komprimovaném formátu JPG, ale nejlépe v RAW a v rozšířeném barevném prostoru Adobe RGB – obsahuje maximální množství dat. Nastavujte nejnižší citlivosti (100 ISO), ty mají vliv na prokreslení. U saturace/sytosti volte vyšší stupeň. Volbou expozice (případně korekce), která srovná křivku histogramu na střed rámečku, zajistíte maximální tonální prokreslení. I při vícebodovém autofokusu nastavujte jen středový – ostření bude víc pod kontrolou. Vyplatí se pracovat v manuálních režimech aparátu.

Olympus E-510, objektiv 50-200mm/2,8-3,5 Olympus E-3, objektiv 300 mm/2,8 Olympus E-3, objektiv 12-60 mm/2,8-4
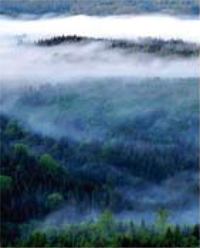
Jarní a podzimní ranní mlhy
rozčlení krajinu na tajemné kulisy.
Je nutné si přivstat, protože slunce
mlhu brzy rozpustí. Předem si
vyhlédněte vyvýšené místo
s dobrým rozhledem.
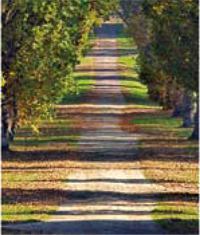
Slunce v krajině kreslí světlem
a stíny, vytváří prostor a zajímavé
linie i v jinak plochém obrazu
a zvýrazní i drobné struktury.
Nejlépe kreslí ráno a vpodvečer,
když je nízko nad obzorem.
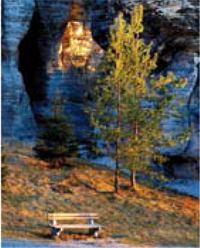
Při západu slunce se vyplatí
fotografovat i po slunci. Tedy nejen
zapadající kotouč, ale také prostor,
který je nasvícen zčervenalým
světlem. Modř oblohy zbarví stíny
sytým studeným odstínem.
Foto Bohumil Eichler Foto Bohumil Eichler Foto Bohumil Eichler

Objektivy

Krajinu lze fotografovat objektivy od rybího oka až po teleobjektivy protažené telekonvertorem. Každé ohnisko vyžaduje jiný přístup, ale přináší zajímavé tvůrčí možnosti.

Zapamatujte si

Pečlivě ostřit, nejlépe jedním ostřicím bodem. Neclonit na clonu 16 a výše – zhoršuje se kresba. Zapnout stabilizátor nebo použít stativ. Zajímavý motiv snímat s různou expozicí, různým ohniskem, z různých stanovišť. Doma u monitoru pak snadno vyberete nejlepší. Na vycházky do přírody si vezměte karty s dostatečnou pamětí a náhradní baterie.

Pomůcky

I v době stabilizátorů se vyplatí používat stativ. Krajina by měla být v celé ploše ostrá (pokud opak není záměr autora), proto cloníme více než jindy a dlouhý čas snímek snadno rozmaže. Stativ je nezbytný při delším ohnisku, při fotografování ranní nebo podvečerní krajiny, kdy je méně světla. Ani s možnostmi softwarových filtrů nelze podcenit ty klasické skleněné nebo akrylátové. Polarizační filtr krajinu obvykle projasní a zkontrastní. Šedý přechodový ztmaví přesvícenou oblohu. Důležitá pomůcka krajináře je vodováha.

Obsah snímku

Snímek má být bohatý na zajímavé linie, struktury, dominantní prvky, světla a stíny, barevné plochy. Neměl by být přeplácaný a zmatečný. Měl by mít určitou harmonii a řád, neměl by být „placatý“. Musí mluvit sám za sebe, aniž by vyžadoval komentář. Dobrý snímek krajiny není jen holý dokument, ale i vyjádření pocitů autora.

Bohumil Eichler je držitel titulu QEP, člen správní rady APF ČR, člen výboru OOA-S a provozovatel workshopu České Švýcarsko, www.fotoeichler.cz.

Ve spolupráci s partnery:


Useful Tips – Pictures of children

When you take pictures of children or places where children play, try to take the picture from a height that is level with the child’s eyes and not from above.    

Pictures of children

Useful Tips – Take pictures of children from their eye level

When you take pictures of children or places where children play, try to take the picture from a height that is level with the child’s eyes and not from above. If you take the picture from an adult’s eye level, the picture will be looking down, showing mostly children’s heads and not really showing their facial expressions. Also, since perspective is accentuated with the zoom at wide-angle (W), children’s heads will be emphasized and their bodies will look smaller than in reality. By squatting and taking the picture so as to have your eyes level with the child’s eyes you will get much better results.

Try different eye levels

Picture taken from the parent’s eye level
When the picture is taken from an adult’s eye level, the head is over-emphasized and it’s difficult to see the child’s expression. In addition, the ground appears as background resulting in a dull picture.


Picture taken from the child’s eye level

When the picture is taken so it is level with the child’s eyes, the facial expression comes out really well. Try squatting and taking the picture so as to have your eyes level with the child’s eyes.


Picture taken from a height lower than the child’s eye level
From time to time, try taking the picture from even a lower height. Since the perspective is accentuated with the zoom at wide-angle (W), the legs will seem longer giving the child a taller, more slender figure. Compact digital cameras are light and small enough to make it easy to take pictures from very close to the ground without using the viewfinder.


Useful Tips – Exposure compensation or flash

When shooting pictures indoors or in a dimly lit location, you need to change the camera setting so that the subject will be adequately illuminated. Methods using exposure compensation or flash are available. Which option you should use will differ depending on the picture subject and the conditions for taking the picture.    

Exposure compensation

Useful Tips – Exposure compensation or flash

When shooting pictures indoors or in a dimly lit location, you need to change the camera setting so that the subject will be adequately illuminated. Methods using exposure compensation or flash are available. Which option you should use will differ depending on the picture subject and the conditions for taking the picture. It is easy to use the flash to illuminate a subject. However, when you use the flash, pictures may seem unnatural since the flash eliminates ambient lighting conditions. By contrast, using exposure compensation preserves the ambient lighting, which results in a more natural-looking picture. However, the shutter speed may drop, making it more likely for subject or camera movement blur to occur. If you are in a situation where blurring may occur, you can increase the ISO sensitivity setting. Increasing the ISO sensitivity, however, may result in more noticeable noise. There is no definite answer as to which method is better, so it is probably best to take your pictures using both the flash and exposure compensation.

Compare these pictures taken with exposure compensation and flash


Shot using exposure compensation: The subject’s facial expression and the incoming light are adequately visible, but the bright areas in the background are overexposed. Shot using flash: The entire picture is nicely lit, but the interior/exterior brightness and the atmosphere of the interior lighting are not accurately reproduced.

Useful Tips – Auto Bracket

When shooting pictures, it is often difficult to decide what exposure setting should be used. One big advantage of digital cameras is that you can delete unwanted pictures after a shooting session. Therefore, it is recommended that you take extra pictures with various exposure settings. In such a case, the BKT (Auto Bracket) function – if your camera supports it – will come in handy.    

Auto Bracket

Useful Tips – Auto Bracket

When shooting pictures, it is often difficult to decide what exposure setting should be used. One big advantage of digital cameras is that you can delete unwanted pictures after a shooting session. Therefore, it is recommended that you take extra pictures with various exposure settings. In such a case, the BKT (Auto Bracket) function – if your camera supports it – will come in handy. BKT is a function that allows you to take successive pictures while gradually changing the amount of exposure compensation. You can shoot as many pictures as required simply by keeping the shutter button pressed.

In most camera models, BKT is located within [DRIVE] mode in the menu. You can set the amount of change in the exposure compensation and the number of pictures that will be taken.

* This is the menu screen of SP-500UZ.

To shoot, simply continue pressing the shutter button. Pictures will be recorded in the following order: If you let go of the shutter button in the middle of auto bracketing, the pictures that have been shot up to that point will be recorded.

The pictures will be recorded from left to right, in the following order:
[BKT] Correction value: 1.0 / Number of pictures: 5

±0 +2.0 +1.0 -1.0  -2.0

The pictures will be recorded from left to right, in the following order:
[BKT] Correction value: 1.0 / Number of pictures: 5

+2.0 +1.0 ±0 -1.0  -2.0

Fotografování osob – Interiéry 2

Použijte scénický režim [SCENE] úsměv [SMILE SHOT]

V režimu zachycení úsměvu [SMILE SHOT] se automatické ostření AF (AF mode) nastaví na režim [FACE DETECT AF], ve kterém fotoaparát v záběru automaticky rozeznává obličeje a udržuje je zaostřené. Po zjištění obličeje se kolem něj objeví zelený rámeček, fotoaparát začne sledovat změny jeho výrazu a čeká na úsměv. Snímek se také může pořídit při velké změně výrazu tváře, i když se nejedná o úsměv. Fotoaparát najednou automaticky pořídí 3 snímky. Režim nahrávání se automaticky změní na menší velikost snímků.

Poté, co fotoaparát zamíříte na předmět, se po zjištění obličeje zobrazí zelený rámeček. Když se fotografovaná osoba usměje, automaticky se pořídí sekvence 3 snímků. Nemusíte mačkat tlačítko spouště.

Vyzkoušejte fotografování s užitím funkce [SMILE SHOT]

* Mějte na paměti, že fotoaparát pořídí snímky při změně výrazu tváře. Snímek se také může pořídit, i když se nejedná o úsměv.

Užitečné rady k zapamatování

  • Pokud se poloha tváře v záběru mění, nemusí se obličej detekovat správně. Pokuste se co nejvíce docílit toho, aby se ani předmět, ani fotoaparát nepohyboval.
  • Pokud váš fotoaparát nedisponuje funkcí zachycení úsměvu [SMILE SHOT], zkuste snímky pořídit s nastavením režimu snímání [DRIVE] na sekvenční snímání. Pokud má váš fotoaparát režim vysokorychlostního sekvenčního snímání, můžete jej také využít a nepromeškat žádnou změnu výrazu tváře.

Fotografování osob – Fotografování nočních scén

Pro fotografování s dlouhou expozicí zvolte scénický režim „noční portrét“ [SCENE] (Night & Portrait).

Pokud při fotografování nočních scén scén s osobou či osobami v popředí použijete blesk v režimu programové automatiky Program Auto(P), osvětlí blesk pouze osobu v popředí, ale noční scéna v pozadí bude na snímku zcela černá. Pro zachycení jak osoby v popředí, tak i noční scény v pozadí, je nutné osvětlit osobu bleskem a současně pro zachycení noční scény použít dlouhou expoziční dobu. Tato metoda fotografování se nazývá synchronizace na dlouhou expozici (pomalou závěrku) a můžete jí pořizovat nádherné záběry. Jednoduše nastavte scénický režim [SCENE] na noční portrét [NIGHT+PORTRAIT]. Pokud váš fotoaparát nastavením [NIGHT+PORTRAIT] nedisponuje, zkuste snímky pořídit s bleskem nastaveným na synchronizaci na dlouhou expozici („slow synchronization“).

Porovnejte efekt fotografování se synchronizací na dlouhou expoziční dobu a se standardní programovou automatikou Program Auto

Snímek pořízený s bleskem v režimu programové automatiky Program Auto Snímek pořízený ve scénickém režimu [SCENE] noční portrét (Night + Portrait): Expoziční doba je trochu delší, což způsobilo rozmazání záběru chvěním fotoaparátu Snímek pořízený ve scénickém režimu [SCENE] noční portrét (Night + Portrait). Byl použit „cross“ filtr.

Užitečné rady k zapamatování

  • Při fotografování noční scenérie musí závěrka zůstat otevřená i po odpálení blesku. Informujte fotografovanou osobu předem, aby se nehýbala, dokud se závěrka neuzavře.
  • Při fotografování s dlouhou expoziční dobou hrozí rozmazání záběru pohybem fotoaparátu. Stabilizujte fotoaparát připevněním na stativ nebo podobnou pomůcku.
  • Je-li fotografovaná osoba dále od fotoaparátu, nemusí ji světlo blesku dostatečně osvítit. V takovém případě osobu postavte blíže.
  • Na zcela tmavém místě může být zaostření osoby obtížnější. Pokud se zaostření nedaří, postavte osobu na více osvětlené místo.
  • Noční scény můžete dále vylepšit „cross“ nebo jiným podobným filtrem. Ačkoliv na některé typy fotoaparátů filtr nemusí být možno upevnit, jeho účinek se projeví i při jeho pouhém podržení rukou před objektivem fotoaparátu.

Taking Pictures of People – Indoors 2

When you take snapshots of children or souvenir pictures you surely want to capture great smiles. But timing the shot to the exact moment of someone smiling is not easy.    

Photo courses

Taking Pictures of People – Indoors 2

Use the [SCENE] mode’s [SMILE SHOT]
In [SMILE SHOT] mode, the AF mode is set to [FACE DETECT AF] so the camera will automatically detect faces within the frame and track them while keeping the focus on the faces. When a face is detected, a green frame will be displayed around it. The camera looks for changes in the facial expression to detect smiles. The camera may also take the picture when there’s a large change in the facial expression, even if it is not a smile. The camera shoots automatically 3 frames at a time. The record mode is automatically changed to a slightly smaller image size.

       
After you point the camera at the subject, the camera will display a green frame when it detects a face. When the subject smiles, a sequence of 3 pictures is shot automatically. No need to press the shutter button.

Try shooting all kind of pictures using the [SMILE SHOT] function


 * Note that the camera shoots the picture when there is a change in the facial expression. A picture may be shot even if the subject is not smiling.

Useful things to remember

  • If the location of the face is moving within the frame, it may not be detected correctly. Try, as much as possible, to have the subject and the camera not move.
  • If your camera does not have the [SMILE SHOT] function, try taking pictures setting [DRIVE] to sequential shooting. If your camera has the high-speed sequential shooting drive mode, you can use sequential shooting and not miss any changes in the facial expression.

Taking Pictures of People – Night Scene

When taking pictures of a combination of people and a night scene, you need to use the flash to illuminate the people and also set a slow shutter speed to get a good picture of the night scene.    

Foto kurzy

Taking Pictures of People – Night Scene

Use [SCENE] (Night & Portrait) for slow synchronization photography

When taking pictures of night scenes that include people, using the flash in the Program Auto(P) mode will illuminate the person but the night scene will appear completely black. To avoid this, illuminate the person with the flash, and use a slow shutter speed for the night scene. This method of photography is known as slow synchronization shooting. You can take beautiful pictures using slow synchronization shooting just by setting [SCENE] to [NIGHT+PORTRAIT]. If your camera does not have the [NIGHT+PORTRAIT] setting, try taking pictures by setting the flash mode to slow synchronization.

Compare the effects of Slow Synchronization photography and the regular Program Auto mode

   
Picture taken using the flash in
Program Auto mode
Picture taken with [SCENE] (Night + Portrait): The shutter speed is a bit too slow resulting in camera blur Picture taken with [SCENE] (Night + Portrait). A cross filter was used


Useful things to remember

  • To shoot night scenery, the shutter must remain open after the flash has gone off. Be sure to tell the subject in advance not to move until the shutter closes.
  • With slow synchronization photography, images are more likely to show blurring since the shutter speed is slower. Stabilize the camera by using a tripod or other similar equipment.
  • If there is a long distance between the camera and the subject, the light of the flash may not reach the subject. Have the subject stand closer to the camera.
  • It may be harder to focus if the subject is in a completely dark location. If it is hard to focus, have the subject stand in a brighter location.
  • To further enhance night scenes, try using a cross filter or a similar filter. Although it may not be possible to attach filters to some cameras, filters can be just as effective if you hold them in front of the lens with your hand.